Pages
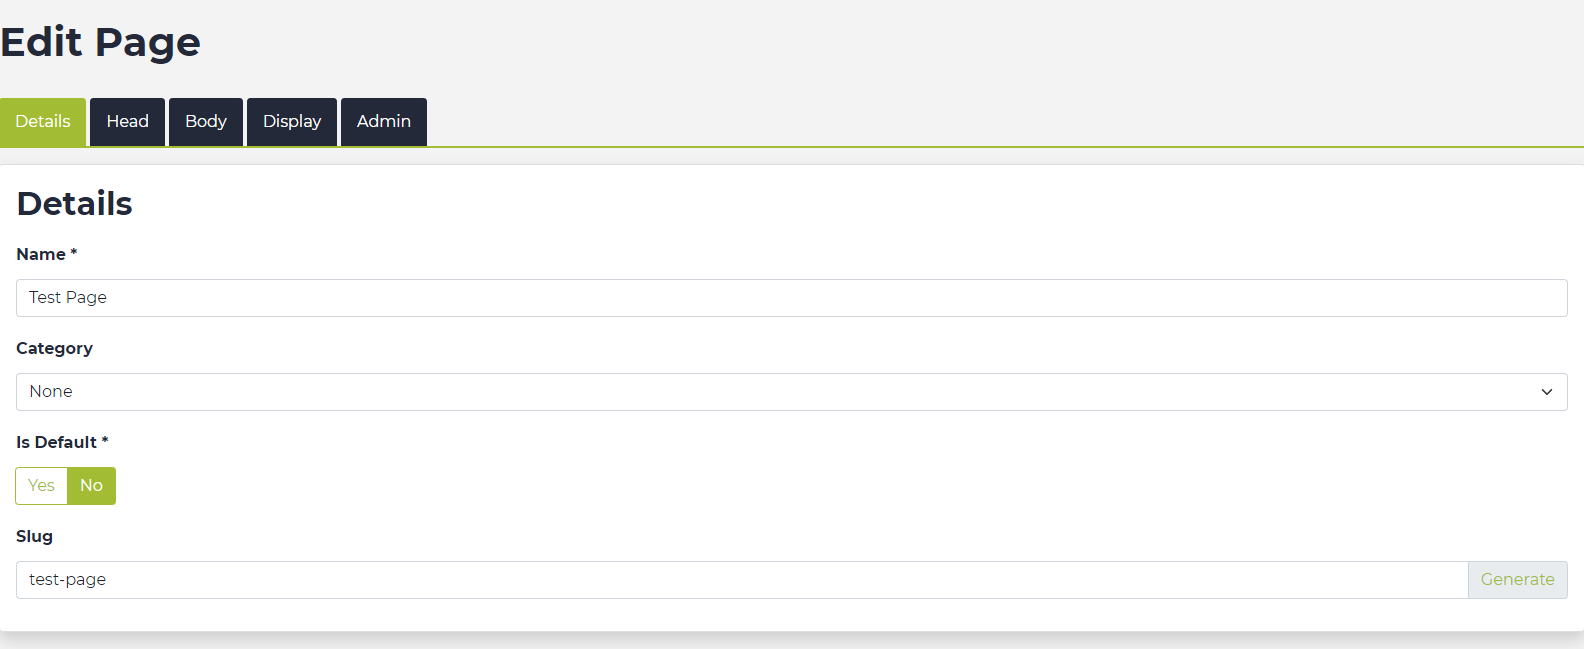
The edit or insert page has been separated into 5 main tabs. This is to help split the form into manageable and related sections.
The Details Tab
The first screen you see when you edit or create a new document is the Details tab.

Name
Choose a short name which describes your page. This field is for internal use only - it won't be visible on your website
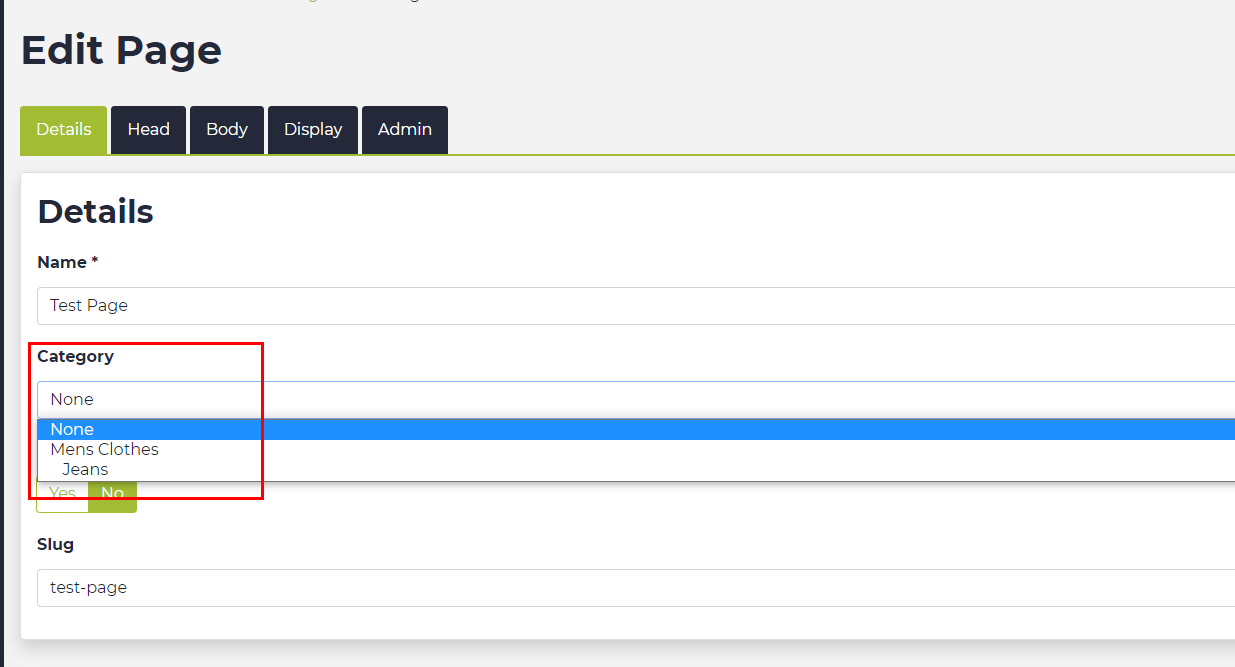
Categories
Your website has been pre-populated with the categories it needs to get you started. Sorting documents into categories:
- helps users find things more easily when they browse your website
- creates a good url structure for your web pages
- is good housekeeping when you are managing a website with a large number of documents.
When you add a new document to your site, it's important to decide what category it belongs to, if any.

In the example above, the new page about a triple chocolate layer cake obviously belongs in the category "Chocoholic Recipes". The navigation links at the top of each page (Where am I?), nicknamed breadcrumbs, help visitors navigate more easily around your website.
Choosing a category also determines part of the url structure for the page.

If the new document is not to be allocated to a category, leave the category field as "None".
Slug
This is the nickname used for the section of the URL (or web address) which comes after the domain name. For example,
www.MyDomainName.co.uk/About-Us.
The easiest way to create the slug is to simply click on the small "Generate" button to the right of this field.
If your document is the default page for its category, leave the Slug field blank and change the Is Default button below to "Yes". The Slug field will disappear.
The Head Tab
View detailed information about completing the Head section.
The Body Tab
In this tab you can control the main body of the page you are creating / editing.
Page Layouts
You can choose from a predefined list of default page layouts. The page layouts control the default number of columns used on a page. Page layout options will differ per design, but you can normally expect to choose from the following options:
- One column
- Two column
- Three column
CSS Class
You may never need to use this field, but in some sites this can be used to apply a CSS class to a page. This override allows you to control all styles used on the page and therefore you could have a different flavour for different sections of the site.
Content
See the following articles detailing how to use the editor.
The Display Tab
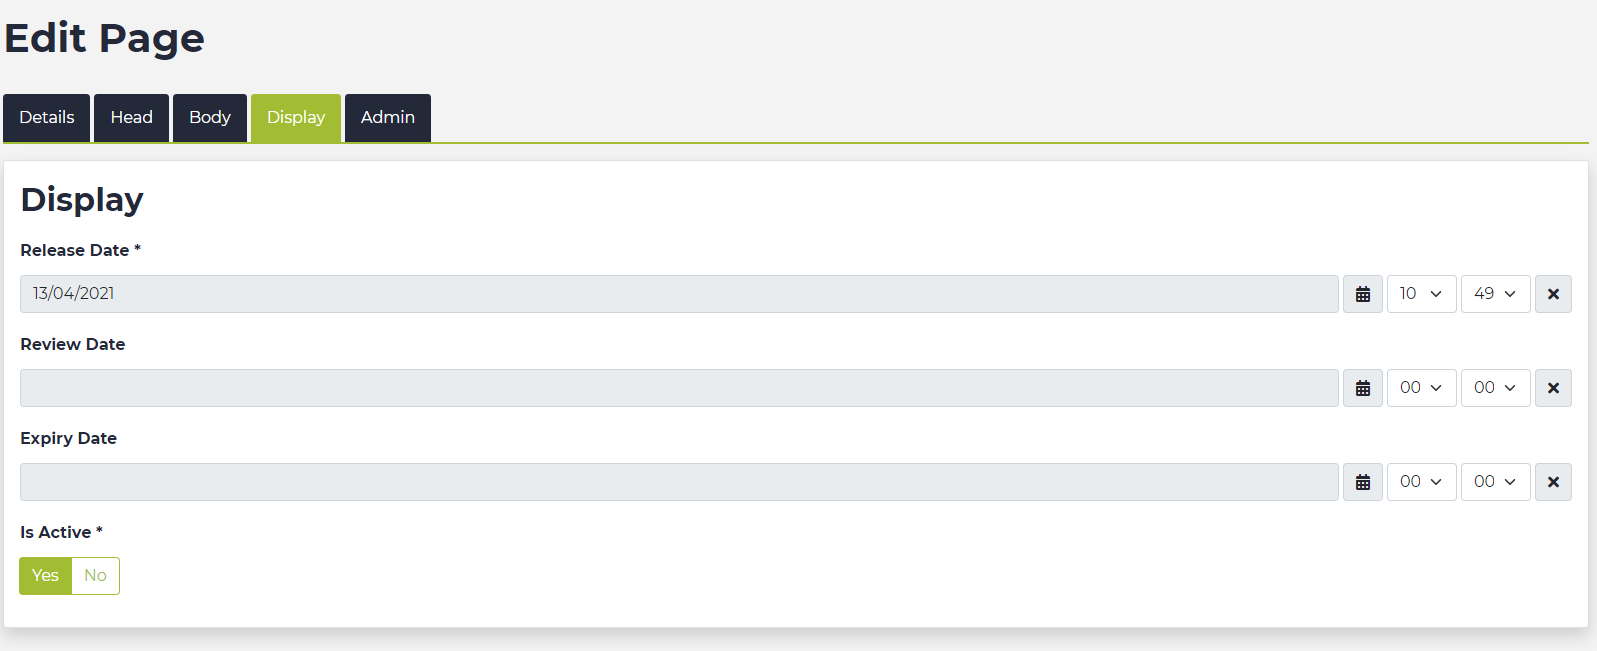
In this area, you can control the visibility of the page on your site.

Release Date
You can choose the date on which your document is published, either the day you wrote it or a date in the future. This is a useful feature if you're trying to get ahead of the game and prepare, for example, a month's worth of blog posts which you'd like to publish once a week for the next few weeks.
Review Date
Set a date here if your document is of a type that you'd like to review at some point. Perhaps your Terms and Conditions, or a price list.
Expiry Date
Setting a date here will unpublish your document. We recommend you leave this field blank unless you are 100% confident that a document can be removed from your site on a certain date.
Active
This can be used as an emergency button to hide your document. Making a page inactive does not delete it, but it will no longer be accessible to visitors on your website.
