Products can be grouped together so that only one product is shown on the site, but it`s multiple products in the back end. For example, this could be used for a T-shirt where you want multiple sizes of the same shirt.
Product Types
To do this you start by selecting a product type (can be new or existing). This can be done by navigating to Admin, then data lists, then select product type.
For demonstration, I created one called Clothing size.
Product Fields
Next is creating a product field, this is done by navigating to Data lists, product fields and then creating new product field.
Details Tab
Name: This is the name used internally to help you differentiate between the fields and will not be displayed to the customer.
Display Name: this is the name that is seen displayed on the form and customers can see this on the website.
Type: this allows you to select how the different options are displayed on the page (dropdown list, checkbox, etc.) Once you select this an options button will appear where you will later be able to add the values.
Is Required: Allows you to put a condition where user cannot proceed to the next step until they have selected an appropriate value such as size for selected T-shirt.
Next step is to select a product type whilst in the Edit field tab and select the appropriate product type. (in this case I selected “Clothing size” which I made earlier).
Options Tab
This allows you to add the values you want to add to your product field (in our case it is going to be the different sizes)
Value: this is where you can add the name of your value and then select add.
Depends on name: This makes it only display the option if a field with this name has the “Depends On Value.”
Is Selected: Set it to yes to allow a drop down choice of products.
Note: always click Save once you are finished.
Adding Grouped Products
Unlike in KIT4 where you would have to make a new product for every value such as a product for small and one for medium, in KIT5 you can just create the product and then select the different values you want.
You can do this by going into products and then select a new or existing product.
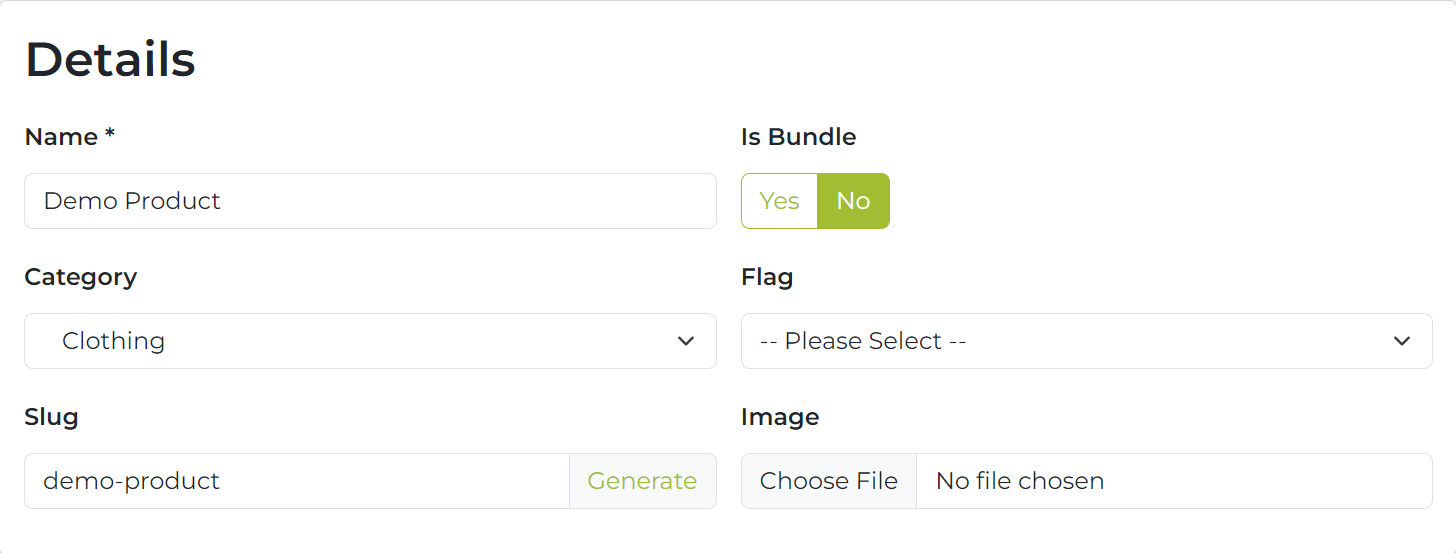
Details Tab
Go through this tab as you would normally do and give your product details such as name, category , slug, image , etc. Once you complete it should look similar to this:
Product details
Type: select the product type you created previously in this case it is clothing size and this will automatically bring up the values you created and they will be displayed under inventory.
Brand: This is where you select the product brand or manufacturer if there is any applicable.
Same applies for product pricing and Identifiers, fill it up as you would do if you were making any product.
Products Inventory
Under this tab you will be able to see inventory details and most importantly the sizes you created as values.
Name: This is the name of the product, I called mine demo-shirt for demonstration purposes.
Price: You can set a standard price for all shirts or you can make size dependent on the size by just putting different prices on different products.
Quantity: This allows you to enter the number of products you have in stock.
Once you have done this, it should look like this on the website. The sizes will be in the form of a drop down menu.
Since I put different prices for different products in the inventory section, it will also charge more or less depending on the size. See example below for large it goes up to £16.80.