Site Map
The website site map is the hierarchical structure of the website. Each element within the hierarchy is known as a site map node or a node in short.
Every page on the site has a site map node it belongs to. For example the login page (/account/login) belongs to the login site map node.
Modifying a Site Map Node
- Find the node you want to update. You may find it easier to use the search or select the node's parent in the drop down list in the top right to help find the node.
- Click the radio button next to the node you want to update
- Click 'Edit' at the top of the page
- From here you can update the following:
- Page Title, Metadata
- Body - This text will appear at the top of the relative page. If you add a Heading 1 (aka h1) then it will override the default one on the page.
- Once you are happy with your changes click 'Save' at the top of the page
Tokens
Sometimes the same site map node might serve multiple pages of the site. For example the view blog post site map node would serve every blog post. If you changed the page title of this node to 'Kontrolit Blog Post' then by default this would be the same for every post. It is best practice to have a unique page title for every page on your site. You have two options to solve this problem:
- You could manually modify the page title for every blog post you don't wish to have the default text. This will override the site map node's page title and allows you to fully customise the page title to whatever you like but it can often be time consuming.
- You can change the site map node's page title to use tokens.
We recommended that you always use tokens to set the default page title for any page which serves multiple pages, even if you plan on manually overriding it incase you accidentally forget to do so.
Tokens can also be used in the head and the body.
Adding Tokens to a Site Map Node's Page Title
- Start by following the instructions above to modify the site map node of interest
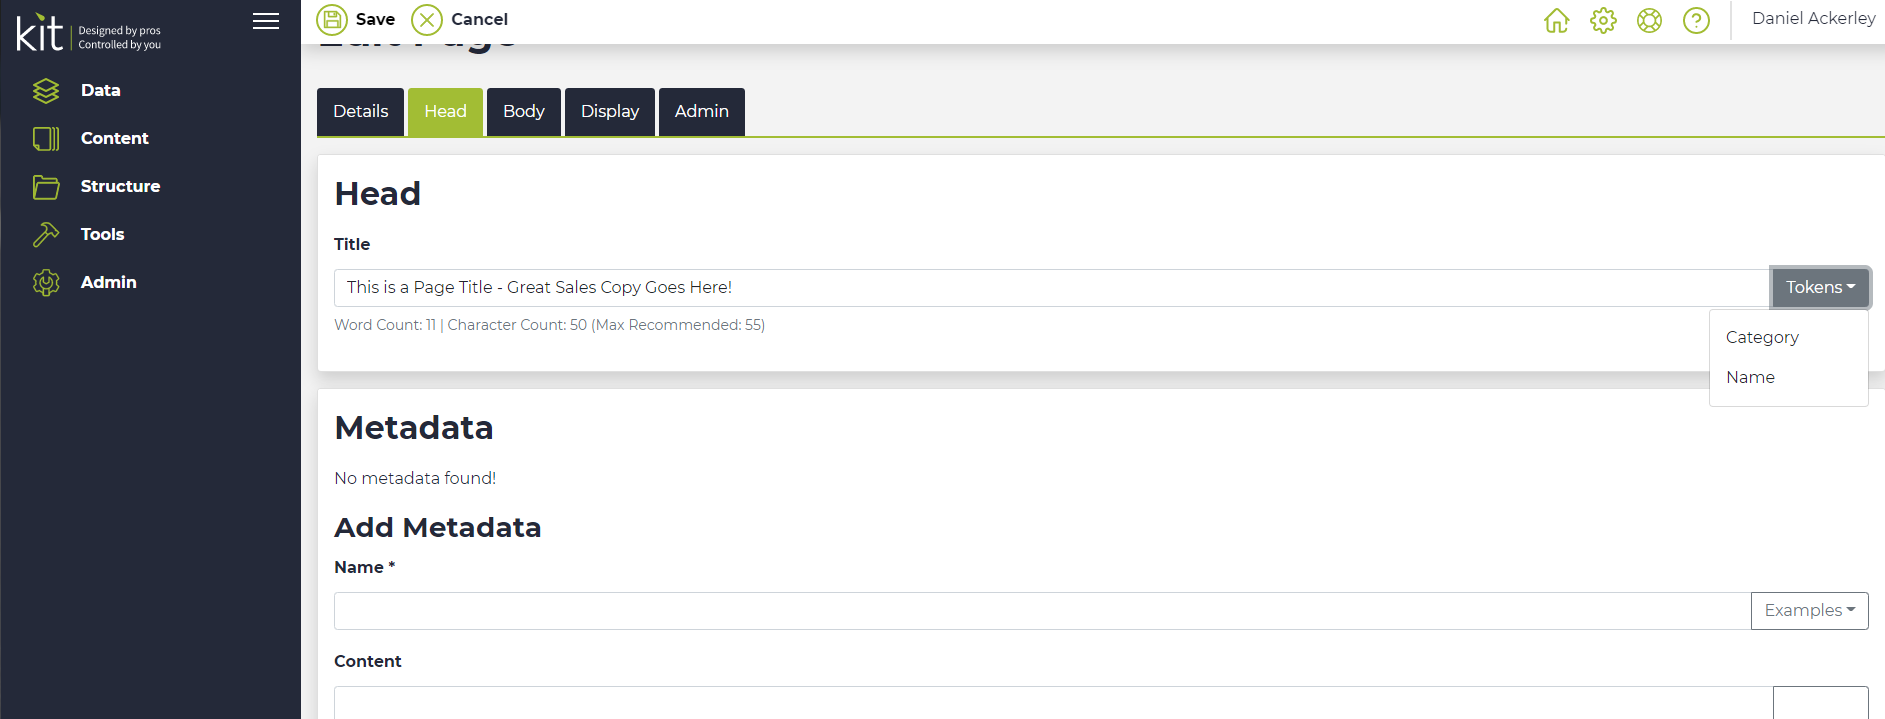
- On the edit page click on the 'Head' tab and then click on the circled icon in the image below to give you a list of the available tokens:

- Now select the token you would like to insert and it will add it where the cursor is within the text box
If you were modifying the view blog post node then the 'Name' token will be replaced with the name of the blog post. Therefore if you set the page title to '{{ Name }} by Kontrolit' and the blog post was called 'SEO Advice' then the page title will be 'SEO Advice by Kontrolit'. - Once again click 'Save' when you are happy with your changes.
